Why Make This Recipe
This dessert is perfect for busy days when you want something sweet without spending hours in the kitchen. Plus, it’s made with simple ingredients that you might already have at home. Whether it’s a weekday or a cozy weekend, this recipe is a crowd-pleaser!
How to Make Condensed Milk and Egg Dessert
Ingredients:
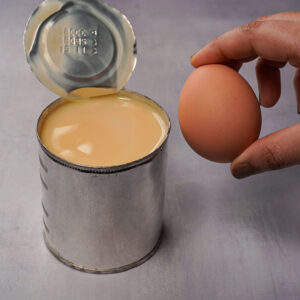
- 1 can condensed milk
- 2 large eggs
- 1 teaspoon vanilla extract
- Pinch of salt
- Optional: Nutmeg or cinnamon for seasoning
Directions:
- Preheat the oven to 350°F (175°C).
- In a mixing bowl, combine condensed milk, eggs, vanilla extract, and salt.
- Whisk the mixture until it’s well blended.
- Pour the mixture into a greased baking dish.
- Bake in the preheated oven for about 25-30 minutes or until the top is golden brown and a toothpick comes out clean.
- Let it cool before serving. Optional: Sprinkle nutmeg or cinnamon on top for added flavor.
How to Serve Condensed Milk and Egg Dessert
Serve this dessert chilled or at room temperature. It’s great on its own, but you can also enjoy it with a scoop of vanilla ice cream or a dollop of whipped cream for extra sweetness.
How to Store Condensed Milk and Egg Dessert
Keep any leftovers in an airtight container in the refrigerator. It will stay fresh for about 3-4 days. Just make sure to let it cool completely before storing!
Tips to Make Condensed Milk and Egg Dessert
- Make sure to whisk the eggs thoroughly to get a smooth texture.
- Don’t skip the vanilla extract, as it adds a lovely flavor.
- If you like a bit of spice, try adding a sprinkle of nutmeg or cinnamon for a warm touch!
The Magic of Condensed Milk and Egg Dessert: A Complete Guide (Flan & Beyond!)
There’s a certain kind of dessert magic that happens when two seemingly simple ingredients, condensed milk and eggs, come together. It conjures images of impossibly smooth, creamy custards, perhaps shimmering under a glistening layer of amber caramel, or maybe a simple, comforting baked pudding. The result is often luxurious, deeply satisfying, and carries a comforting sweetness that speaks to tradition and simple pleasures. The term “Condensed Milk and Egg Dessert” itself points to a beloved category where these ingredients are the undisputed stars, creating textures and richness that are hard to achieve otherwise.
While the description could encompass a few variations, its strongest association, recognized globally, is with iconic custard-based desserts like Flan, particularly the renowned Filipino Leche Flan. These desserts showcase the incredible synergy between the effortless sweetness and body provided by condensed milk and the structural, enriching power of eggs. Understanding the base ingredients is key; knowing the properties of understanding sweetened condensed milk [Link 1] – how its low water content and high sugar concentration create thickness and prevent large ice crystals (critical in some applications, though heat setting is key here) – helps appreciate its role. Similarly, understanding the role of eggs in creating custards [Link 2], particularly how their proteins coagulate with heat to set the mixture, is fundamental to mastering these seemingly simple treats.
From the elegant Crème Caramel of French patisseries (though often adapted with condensed milk) to the rich Pudim de Leite of Brazil and the celebrated Leche Flan of the Philippines, this combination has a remarkable global footprint. This comprehensive guide will serve as your ultimate resource. We will delve deep into the most classic and beloved iteration – the Flan or Leche Flan – exploring its nuances, mastering the essential techniques (including the crucial caramel and water bath), offering pro tips for silky-smooth perfection, suggesting delightful variations, and answering all your frequently asked questions about the wonderful world of “Condensed Milk and Egg Dessert.” Making the perfect caramel topping is an art in itself, and reviewing tips for mastering the art of making caramel [Link 3] can prevent common pitfalls and ensure that beautiful amber crown.
Why We Crave These Creamy, Dreamy Desserts
What is it about the combination of condensed milk and eggs that makes the resulting desserts so universally loved? Several factors contribute to their enduring appeal:
Unparalleled Creaminess & Texture: The hallmark of these desserts is their texture. They are typically dense yet incredibly smooth, rich, and silky on the palate – a luxurious mouthfeel that is both comforting and sophisticated.
Comforting Sweetness: Sweetened condensed milk provides a distinct, comforting sweetness that requires little to no additional sugar in the custard base itself. It’s a rich, satisfying sweetness that feels complete.
Deceptive Simplicity (Ingredient-Wise): At their core, many condensed milk and egg desserts, especially flans, rely on a surprisingly short list of ingredients: condensed milk, eggs, vanilla, and sugar for the caramel. This accessibility makes them appealing, although mastering the technique is key to perfection.
Nostalgia & Tradition: For many cultures, particularly Filipino and Latin American communities, Leche Flan or Flan is more than just dessert; it’s a staple at celebrations, holidays (like Noche Buena), and family gatherings. Its taste is deeply intertwined with memories and tradition. Find more classic holiday dessert recipes here <– INSERT YOUR URL HERE.
Make-Ahead Marvel: Because these custards require significant chilling time to fully set, they are ideal make-ahead desserts. This makes them perfect for entertaining, allowing you to focus on other preparations on the day of the event.
Defining the Genre: Flan, Custard, and Beyond
While “Condensed Milk and Egg Dessert” could technically apply to various sweets, the search results and culinary consensus heavily point towards custard-based preparations, with Flan being the quintessential example.
A. The Star Player: Flan / Leche Flan
Description: A baked egg custard renowned for its smooth texture and signature soft caramel topping. The custard is baked in a caramel-lined mold and then inverted onto a serving plate, allowing the caramel to pool around the base as a sauce.
Key Characteristics: What often sets condensed milk-based flans, especially Filipino Leche Flan, apart is their incredible richness and density. This is often achieved by using a higher proportion of egg yolks compared to whole eggs and relying heavily on condensed milk for both sweetness and body. The texture is typically firmer and less jiggly than some other custard types.
Cultural Significance: Leche Flan is a cornerstone of Filipino dessert culture, a celebratory dish with deep roots. Various Flan traditions exist throughout Latin America and Spain, each with subtle variations but sharing the core concept.
B. Close Cousins: Variations on a Theme
Crème Caramel: The classic French dessert is structurally similar (custard baked with caramel, then inverted). However, traditional Crème Caramel recipes typically use fresh milk, cream, sugar, and whole eggs for the custard base, resulting in a potentially lighter, more delicate texture compared to the dense richness of many condensed milk flans. Condensed milk versions exist as a popular shortcut or variation.
Pudim de Leite: This beloved Brazilian dessert is very similar to flan and often uses condensed milk and whole eggs. Its preparation and texture closely mirror that of condensed milk flan.
Baked Custard: This refers to a broader category of egg-set custards baked until firm. While traditional versions use milk, sugar, and eggs, condensed milk baked custards leverage the convenience and richness of condensed milk. They are often simpler, baked directly in ramekins or a larger dish, and typically served without the inverted caramel topping (though sometimes with caramel sauce drizzled over). Explore simple baked custard recipes <– INSERT YOUR URL HERE for comparison.
C. Other Possibilities (Brief Mention)
While the focus here is firmly on Flan/custard types, it’s worth noting that condensed milk and eggs are key players in other desserts too, such as certain types of “Magic Cakes” where the batter miraculously separates into layers during baking, or some simple stovetop puddings. However, for the specific keyword “Condensed Milk and Egg Dessert,” the Flan/Leche Flan/Pudim/Crème Caramel family reigns supreme.
Ingredient Spotlight: The Dynamic Duo & Supporting Cast
Let’s take a closer look at the crucial ingredients that make these desserts sing.
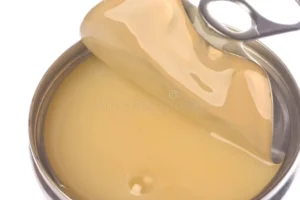
A. Sweetened Condensed Milk: The Heart of Richness
What It Is: Simply put, it’s cow’s milk from which about 60% of the water has been removed, followed by the addition of a significant amount of sugar (typically around 40-45%). This process results in a thick, syrupy, intensely sweet product that is shelf-stable until opened. Understanding the science behind understanding sweetened condensed milk [Link 1] reveals why it’s so effective in desserts requiring richness and smoothness.
Role in Dessert: It serves multiple functions:
Provides the primary sweetness, eliminating the need for much (or any) additional sugar in the custard itself.
Contributes significant moisture and richness due to the concentrated milk solids and sugar.
Its thickness helps create the characteristic dense, creamy texture of flans made with it.
Choosing a Brand: While many brands exist (Eagle Brand, Carnation, etc.), most standard full-fat versions work interchangeably in recipes like flan. Slight variations in thickness might exist but usually don’t drastically alter the outcome. Always use sweetened condensed milk, not evaporated.
vs. Evaporated Milk: Crucially, these are NOT the same. Evaporated milk also has water removed but is unsweetened and much thinner. Substituting it directly for condensed milk will result in a completely different, unsweetened, and likely unset dessert.
B. Eggs: The Structure and Soul
Role in Custard: Eggs are the magic ingredient that transforms the liquid mixture into a set custard. When heated gently, the proteins in the eggs unwind and link together (coagulate), forming a delicate network that traps the liquid, resulting in the characteristic smooth but firm texture. Egg yolks, specifically, are rich in fat and lecithin, contributing significantly to richness, colour, and emulsification (helping create a smooth, stable mixture). Learning about the role of eggs in creating custards [Link 2] highlights their importance.
Whole Eggs vs. Egg Yolks: This is a key differentiator in flan styles.
Leche Flan: Traditionally uses a high ratio of egg yolks (sometimes exclusively yolks) to condensed milk. This results in an exceptionally rich, dense, smooth, and deeply coloured custard.
Other Flans/Pudims: Many recipes use whole eggs, which provide both setting power (from whites and yolks) and richness (from yolks). This typically yields a slightly lighter, less intensely rich custard compared to yolk-heavy versions, but still very creamy and delicious.
Freshness & Size: Use fresh eggs for the best flavour and performance. Most recipes assume large eggs unless stated otherwise.
Tempering (If Applicable): While less common for simple baked flans where all ingredients are mixed cold/lukewarm, some custard recipes involve heating the milk mixture first. In those cases, tempering is essential: slowly whisking a portion of the hot liquid into the beaten eggs before combining everything prevents the eggs from scrambling.
C. Sugar: For the Golden Crown (Caramel)
Role: The primary role of sugar here is not in the custard itself (condensed milk handles that), but in creating the iconic caramel layer. When heated, sugar melts and undergoes complex chemical changes, developing deep amber colour and a characteristic bittersweet flavour profile that perfectly complements the sweet custard. Upon unmolding, this hardened caramel liquefies slightly to form the sauce.
Type: Granulated white sugar is the standard choice. Its neutral flavour allows the pure caramel notes to shine through, and it melts and colours predictably.
Wet vs. Dry Caramel Method: These are the two main approaches to making the caramel topping, each with advocates. We’ll detail these in the step-by-step section, but briefly:
Wet Caramel: Sugar dissolved in a small amount of water before heating. Generally considered easier to control and less prone to burning, but takes slightly longer.
Dry Caramel: Sugar heated directly in the pan without water. Melts faster but requires more vigilant attention to prevent scorching and ensure even melting.
D. Flavourings & Liquids: The Finishing Touches
Vanilla Extract: Considered essential by most. Pure vanilla extract enhances the sweetness, adds warmth, and helps mellow any potential “eggy” flavour from the custard. Use good quality extract for the best results. Consider making your own homemade vanilla extract <– INSERT YOUR URL HERE for superior flavour.
Other Liquids (Optional): While many condensed milk flans rely solely on the liquid from the milk and eggs, some recipes incorporate a small amount of evaporated milk, fresh milk, or even water. This can be used to slightly adjust the richness, density, or consistency of the custard base. Follow your specific recipe.
Salt: A tiny pinch of salt (less than 1/8 teaspoon) added to the custard mixture is optional but can actually enhance the perception of sweetness and provide better flavour balance.
Flavor Variations (Introduction): Beyond vanilla, citrus zest (lime, lemon, orange), other extracts (almond, coconut), or spices (cinnamon, nutmeg) can be added to the custard for variation. These will be explored later.
Essential Tools for Custard Crafting
Having the right equipment makes the process of creating these delicate desserts much smoother:
Flan Mold (Llanera) or Ramekins:
Traditional Llaneras: Oval-shaped metal molds commonly used for Leche Flan.
Round Cake Pan: A standard 8 or 9-inch round metal cake pan works well.
Loaf Pan: Can also be used for a sliceable flan.
Individual Ramekins: Perfect for single servings (baking time will be shorter).
Material: Metal pans conduct heat efficiently for caramel making and baking. Glass or ceramic can be used, but may require slight adjustments in baking time.
Roasting Pan or Large Baking Dish: Essential for the water bath (bain-marie). It needs to be larger than your chosen flan mold/ramekins and deep enough to hold hot water coming about halfway up their sides.
Mixing Bowls: Medium and large bowls for whisking eggs and combining custard ingredients.
Whisk: For gently combining eggs and incorporating liquids.
Fine-Mesh Strainer (Crucial): Non-negotiable for ensuring a perfectly smooth, silky custard free from any eggy bits or bubbles.
Saucepan: A heavy-bottomed saucepan for making the caramel. Light-colored interiors make it easier to judge caramel colour.
Measuring Cups & Spoons: For accurate measurement of condensed milk, eggs, vanilla, etc.
Kettle or Pitcher: For easily and safely pouring hot water into the water bath around the molds.
Aluminum Foil: For potentially covering the flan during baking and/or covering during chilling.
Mastering the Classic: Step-by-Step Condensed Milk Flan (Leche Flan Style)
This detailed guide focuses on the popular Leche Flan style, emphasizing richness from egg yolks and condensed milk. Adjustments for whole egg versions are similar.
A. Step 1: Prepare the Caramel – The Foundation
This step requires focus as caramel changes quickly. Choose your preferred method:
Choose Method & Prepare Mold: Select either the Wet or Dry Caramel method below. Have your chosen flan mold(s) or ramekins ready and nearby.
Wet Method (Slightly Easier Control):
Combine ¾ to 1 cup of granulated white sugar and ¼ cup of water in a clean, heavy-bottomed saucepan.
Place over medium heat. Stir gently only until the sugar is dissolved. Once dissolved and simmering, stop stirring.
Let the mixture bubble. You can gently swirl the pan occasionally for even colouring. If sugar crystals form on the sides, brush them down carefully with a pastry brush dipped in water.
Cook until the mixture turns a clear, deep amber colour (like honey or copper). This can take 5-10 minutes. Watch carefully as it goes from light gold to amber quickly. Do not let it smoke or turn dark brown (burnt).
Dry Method (Faster, Needs More Attention):
Place ¾ to 1 cup of granulated white sugar in an even layer in a clean, dry, heavy-bottomed saucepan.
Heat over medium to medium-low heat. The sugar will start to melt around the edges first, becoming liquid.
As it melts, gently stir the melted portions towards the center with a heatproof spatula, encouraging the rest of the sugar to melt evenly. Adjust heat as needed if melting too quickly or unevenly.
Continue heating and stirring gently until all the sugar is melted, smooth, and has reached a deep amber colour. Be vigilant to prevent burning. Resources on mastering the art of making caramel [Link 3] often detail troubleshooting for both methods.
Pouring Caramel: IMMEDIATELY and VERY CAREFULLY (caramel is extremely hot, over 300°F/150°C!) pour the molten caramel directly into the bottom of your flan mold(s) or ramekins.
Coat Bottom: Quickly tilt and swirl the mold(s) to coat the entire bottom surface evenly with the caramel before it starts to harden. Set the mold(s) aside on a heatproof surface. The caramel will harden rapidly and may crackle loudly – this is normal.
B. Step 2: Create the Silky Custard Base
Combine Liquids (Optional Step): If your specific recipe calls for additional liquid like evaporated milk or water, gently warm it with the condensed milk in a saucepan over low heat just until warm (not hot or simmering). This helps it incorporate smoothly. If using only condensed milk, you can skip this warming step. (Typical Leche Flan uses 1-2 cans of condensed milk).
Prepare Eggs/Yolks: In a large bowl, place the egg yolks (e.g., 8-12 large yolks for a typical Leche Flan) or whole eggs if using that variation. Add the vanilla extract (e.g., 1-2 teaspoons).
GENTLY Whisk: Using a whisk, gently beat the eggs/yolks and vanilla just until combined. Crucial point: Avoid incorporating excessive air. Do not whisk vigorously or until frothy. The goal is simply to break up the yolks and blend them slightly. Over-whisking creates air bubbles that translate into an undesirable texture (holes) in the finished flan.
Temper (Combine Slowly): If you warmed the condensed milk mixture, slowly drizzle it in a thin stream into the beaten eggs/yolks while whisking constantly but gently. If using room temperature condensed milk, you can add it in a few additions, whisking gently until smooth after each addition. The aim is smooth incorporation without scrambling the eggs or creating foam.
STRAIN THE MIXTURE (Non-Negotiable): Position a fine-mesh sieve over the caramel-coated mold(s). Slowly pour the entire egg and condensed milk custard mixture through the sieve directly into the mold(s). This critical step removes any tiny bits of cooked egg, the chalazae (the white stringy bits attached to yolks), and any accidental lumps, guaranteeing a perfectly smooth, silky final texture.
Skim Foam: Gently skim off any foam or bubbles that may have risen to the surface of the custard in the mold using a spoon.
C. Step 3: Bake Gently in a Water Bath (Bain-Marie)
The water bath ensures gentle, even heat, preventing the custard from boiling, cracking, or becoming rubbery. Understanding the purpose of a bain-marie in baking <– INSERT YOUR URL HERE clarifies why it’s essential for custards.
Preheat Oven: Ensure your oven is preheated to the temperature specified in your recipe, typically low – around 300°F to 325°F (150°C to 160°C). Position an oven rack in the center.
Prepare Water Bath: Carefully place the filled flan mold(s) or ramekins inside a larger roasting pan or deep baking dish.
Add Hot Water: Using a kettle or pitcher, carefully pour hot (from the tap or gently heated, not boiling) water into the larger roasting pan, pouring around the mold(s), not into them. Fill the pan until the water level reaches about halfway up the sides of the flan mold(s). This water level is important for proper insulation.
Cover (Optional but Recommended): Loosely tent the entire roasting pan, or just the individual mold(s), with aluminum foil. This helps trap steam, promotes even cooking, and prevents a thick skin from forming on top of the custard.
Bake: Carefully slide the entire water bath setup onto the center rack of the preheated oven. Bake for the time indicated by your recipe, which can vary significantly based on the size and depth of your mold – anywhere from 45 minutes for small ramekins to 90 minutes or more for larger molds.
Check for Doneness: Start checking around the minimum time. The custard is ready when:
The edges are firmly set.
The center still has a noticeable jiggle when the pan is gently shaken (it shouldn’t be liquidy, but should wobble slightly like set Jell-O).
A thin knife inserted about 1 inch from the edge comes out clean, while a knife inserted directly in the center might still come out slightly wet (it will finish setting as it cools). Do not overbake! Overbaking is the primary cause of a rubbery or curdled texture.
D. Step 4: Chill Thoroughly – Patience is Key
This step is crucial for the custard to fully set and develop its characteristic texture, and for the caramel to liquefy slightly for easy release.
Cool Down in Water Bath: Carefully remove the roasting pan (with the mold(s) still inside) from the oven. Place the entire setup on a wire rack and let the flan cool in the water bath for about 30-60 minutes. This gradual cooling helps prevent cracking.
Remove from Water Bath: Carefully lift the flan mold(s) out of the water bath. Remove the foil cover (if used). Place the mold(s) on the wire rack and let them cool completely to room temperature.
Refrigerate: Once completely cool, cover the mold(s) tightly with plastic wrap. If you didn’t use foil during baking and a slight skin formed, you can gently press the plastic wrap directly onto the surface to prevent further skin formation or drying. Refrigerate for at least 4-6 hours, but overnight is strongly recommended for the best set and easiest unmolding.
E. Step 5: The Grand Unveiling – Unmolding
The moment of truth!
Loosen Edges: Remove the plastic wrap. Run a thin, flexible knife or an offset spatula carefully around the entire inside edge of the custard, pressing gently against the mold wall to break the seal.
Invert: Choose your serving plate – ensure it has a slight rim or lip to catch the delicious caramel sauce. Place the serving plate upside down firmly on top of the flan mold.
The Flip: Take a deep breath! Firmly gripping both the mold and the plate together, quickly and confidently invert them in one smooth motion. Keep the mold pressed onto the plate.
Lift Off: Set the plate down. The flan should gently release onto the plate with an audible sigh or squish. If it doesn’t release immediately, do not force it. You can try:
Gentle Shaking: Give the mold a few gentle side-to-side jiggles.
Warm Water Assist: Briefly (15-30 seconds) set the very bottom of the metal mold in a shallow dish of hot water to help liquefy the caramel slightly. Try inverting again.
Patience: Sometimes just waiting a minute allows gravity and the caramel to do their work.
Admire: Lift the mold straight up. The beautiful condensed milk and egg dessert should now be sitting proudly on the plate, surrounded by its glorious caramel sauce. Any remaining caramel in the mold can often be gently warmed and drizzled over.
(Part 2 begins here)
Secrets to Perfection: Troubleshooting Common Condensed Milk and Egg Dessert Issues
Achieving that flawlessly smooth, perfectly set flan takes a little practice and attention to detail. Here’s how to troubleshoot common pitfalls:
A. Achieving Ultra-Smooth, Bubble-Free Custard: The Silky Dream
Those little holes or a rough texture can mar the perfect flan experience. Here’s how to prevent them:
Gentle Whisking: Remember, you’re combining, not aerating. Whisk eggs/yolks just until homogenous. Excessive air incorporated now becomes bubbles later.
Low & Slow Tempering: Introduce warm liquids to eggs gradually while whisking gently. Pouring hot liquid too quickly can slightly cook bits of egg.
Straining is Mandatory: This is non-negotiable for smoothness. Pouring the final custard mixture through a fine-mesh sieve before it goes into the mold catches any stray lumps, cooked egg bits, or the stringy chalazae. Don’t skip this!
Skim Foam/Bubbles: After pouring into the mold, use a spoon to gently skim off any visible foam or bubbles resting on the surface. You can also lightly tap the mold on the counter to encourage bubbles to rise.
Low Oven Temp & Water Bath: The bain-marie (water bath) is essential. It insulates the custard from direct oven heat, ensuring gentle, even cooking. Baking at a low temperature (300-325°F / 150-160°C) prevents the liquid from boiling within the custard, which is the primary cause of holes and a curdled texture.
B. Perfecting the Caramel: The Golden Crown
Caramel can be tricky, but these tips help:
Avoiding Crystallization: Sugar’s nemesis!
Cleanliness: Start with a spotlessly clean, dry saucepan. Any impurities can trigger crystallization.
Wet Method: Once simmering, do not stir. Stirring can splash sugar onto cooler pan sides, forming crystals. If crystals appear, carefully brush them down with a pastry brush dipped in water. Some add a tiny drop of corn syrup or lemon juice to inhibit crystals, though not usually necessary if careful.
Dry Method: Stir gently and consistently only as needed to ensure even melting.
Preventing Burning: Caramel goes from perfect amber to burnt black in seconds!
Constant Vigilance: Watch the pan like a hawk, especially as it starts colouring.
Moderate Heat: Use medium or medium-low heat. High heat rushes the process and increases burn risk.
Colour Judge: Aim for a deep amber or copper penny colour. Remove from heat immediately upon reaching the desired shade – residual heat will continue cooking it slightly.
Burnt? Start Over: Burnt caramel tastes acrid and unpleasant. There’s no saving it; discard and begin again.
Even Coating in Mold: As soon as the caramel is ready, pour it into the mold and immediately tilt and swirl to coat the bottom evenly before it hardens. Work quickly and carefully (it’s HOT!).
C. Ensuring Even Baking & Setting: The Wobble Test
Water Bath is Crucial: Reiterate its importance for insulation and gentle heat. Ensure water is hot when adding it to the pan.
Correct Oven Temperature: Stick to the lower temperatures recommended. An oven thermometer can verify accuracy if you suspect issues. Too hot = rubbery, cracked, or weeping flan.
The Doneness Test: Learn to trust the jiggle. The edges should be set, but the very center should still wobble slightly when gently shaken. A knife near the edge should be clean; the center might still be slightly wet. Overbaking leads to poor texture. Remember carryover cooking continues slightly as it cools.
D. Successful Unmolding Every Time: The Grand Finale
Chill Completely (No Shortcuts!): This is the #1 key. A fully chilled, fully set flan is much more stable and likely to release cleanly. Minimum 4-6 hours, but overnight is best.
Loosen Edges Thoroughly: Run that thin knife or offset spatula all the way around, pressing gently against the mold. Ensure you’ve broken the seal everywhere.
Confident Inversion: Place the rimmed plate firmly on top. Take a breath and flip quickly and decisively in one motion. Hesitation can sometimes cause issues.
Gentle Persuasion If Stuck: If it doesn’t drop immediately, resist banging it hard. Try the gentle jiggle or the brief warm water bath on the mold’s base first.
Creative Custards: Flavor Variations and Twists
While the classic vanilla condensed milk and egg dessert is divine, it’s also a wonderful base for creativity:
A. Flavor Infusions (Introduce flavour early)
Citrus Zest: Finely grate the zest of 1 lime (classic for Leche Flan), lemon, or orange directly into the egg/condensed milk mixture before straining. Adds fantastic brightness.
Coffee/Espresso: Dissolve 1-2 tablespoons of instant espresso powder into the condensed milk (perhaps warmed slightly to help dissolve). Creates a rich coffee flan. Find more delicious coffee flavored desserts <– INSERT YOUR URL HERE.
Spices: Steep a cinnamon stick or a star anise pod in the condensed milk if warming it, then remove before combining with eggs. Or, whisk a pinch (¼ tsp) of ground nutmeg or cardamom into the custard before straining.
Extracts: Replace some or all of the vanilla with almond extract (use less, it’s potent!), coconut extract, or orange extract.
Tea Infusion: Gently warm the condensed milk (with any added milk/water) and steep 2-3 strong chai tea bags or Earl Grey tea bags for 10-15 minutes. Strain well before combining with eggs.
B. Texture & Add-ins
Coconut Flan (Leche Flan sa Gata): Replace some or all of any added liquid (or even some condensed milk, adjusting sweetness) with full-fat coconut milk. You can also fold in toasted shredded coconut into the custard before baking (it may float or sink).
Cheese Flan (Queso Flan): Blend 4-8 ounces of softened cream cheese into the condensed milk and egg mixture until very smooth before straining. Adds tanginess and extra richness.
C. Topping Variations (Beyond Caramel)
While the caramel is iconic, consider alternatives or additions:
Fresh Fruit: Serve slices alongside fresh berries (raspberries contrast beautifully), ripe mango slices, or lychees.
Fruit Compote: A simple berry or tropical fruit compote spooned alongside offers freshness. Try a quick mixed berry compote recipe <– INSERT YOUR URL HERE.
Nut Brittle: Sprinkle crushed peanut, cashew, or pecan brittle over the unmolded flan just before serving for a crunchy texture contrast.
Chocolate or Dulce de Leche Drizzle: A thin drizzle of melted dark chocolate or rich dulce de leche over the top can be decadent. Perhaps use this easy homemade dulce de leche recipe <– INSERT YOUR URL HERE.
D. Related Desserts (Brief Mention)
Magic Cake/Impossible Pie: While different, these sometimes use condensed milk and eggs, separating into distinct layers (cake, custard, crust) during baking – another form of kitchen magic!
Simple Baked Custards: As mentioned, omit the caramel, bake the custard mixture in ramekins in a water bath, and serve chilled, perhaps dusted with nutmeg. Explore other easy pudding and custard recipes <– INSERT YOUR URL HERE.
Presentation & Serving Suggestions
Show off your beautiful creation!
The Grand Reveal: Unmolding is part of the presentation. Choose a serving platter that is slightly larger than your mold and has a definite rim or lip to elegantly contain the flowing caramel sauce.
Garnishes (Keep it Simple): Often, the beautiful amber caramel is garnish enough. If desired, add:
A sprig of fresh mint.
A few strategically placed fresh raspberries or pomegranate seeds for colour contrast.
Finely grated lime or orange zest.
Toasted sliced almonds or coconut flakes (optional).
A dollop of lightly sweetened whipped cream served on the side is sometimes offered, but shouldn’t obscure the flan itself. See how to make perfect whipped cream <– INSERT YOUR URL HERE.
Occasions: This “Condensed Milk and Egg Dessert” is perfect for holidays, special dinners, potlucks (it travels relatively well in its mold before unmolding), or anytime you need a reliably impressive make-ahead dessert.
Temperature: Serve well-chilled, straight from the refrigerator, for the best firm texture and refreshing contrast, especially with the warm notes of the caramel.
Storage Savvy: Keeping Your Custard Creation Fresh
Proper storage is key for maintaining the quality of your flan:
Refrigeration is Mandatory: Due to the high content of eggs and dairy (condensed milk), leftovers must be stored in the refrigerator promptly.
Cover Well: Once unmolded, cover any remaining flan tightly with plastic wrap, pressing it gently against any cut surfaces to prevent drying. If still in the mold, keep it covered with plastic wrap. This prevents the custard from absorbing refrigerator odors and drying out.
Shelf Life: Consume within 3-4 days for best texture and safety. Caramel may start to weep or thin over time, which is normal.
Freezing: Not Recommended. The delicate protein structure of the egg custard does not freeze well. Upon thawing, it typically becomes watery, grainy, and loses its signature silky texture. It’s best enjoyed fresh within a few days of making.
Frequently Asked Questions (FAQs) – Condensed Milk & Egg Dessert Queries
Let’s tackle some common questions about making these delightful desserts:
Q1: How do I get my flan/custard perfectly smooth and not bubbly?
A: The keys are: 1) Whisk eggs/yolks gently just to combine, avoiding air incorporation. 2) Strain the custard mixture through a fine-mesh sieve before baking – this is non-negotiable. 3) Bake in a water bath at a low oven temperature (300-325°F / 150-160°C) to prevent boiling. 4) Skim off any surface foam before baking.
Q2: Can I substitute evaporated milk for condensed milk?
A: No. They are fundamentally different. Sweetened condensed milk is thick and very sweet due to added sugar. Evaporated milk is unsweetened and has the consistency of regular milk. Using evaporated milk in a recipe calling for condensed milk will result in an unsweetened, likely unset dessert unless you significantly modify the entire recipe (adding sugar, potentially thickeners).
Q3: What’s the difference between Leche Flan and Crème Caramel?
A: While visually similar, the main differences often lie in the custard base. Filipino Leche Flan typically relies heavily on condensed milk and a high proportion of egg yolks, leading to a very rich, dense, and smooth texture. Traditional French Crème Caramel usually uses fresh milk/cream, sugar, and often whole eggs, resulting in a potentially lighter, more delicate custard.
Q4: Can I make this dessert ahead of time?
A: Yes, absolutely! In fact, it’s ideal to make it ahead. Flan requires several hours (minimum 4-6, preferably overnight) of chilling time in the refrigerator after baking to allow the custard to fully set and firm up properly before you can successfully unmold it. It’s one of the best make-ahead dessert recipes <– INSERT YOUR URL HERE.
Q5: Why did my caramel get hard or crystallize?
A: Crystallization (graininess) can happen if: the saucepan wasn’t perfectly clean, sugar crystals splashed onto the sides, or you stirred the sugar/water mixture (wet method) before the sugar fully dissolved. Hardening too quickly usually means it was cooked to too high a temperature or cooled too fast. If badly crystallized or burnt, it’s best to discard and start the caramel over. Referencing guides on making perfect caramel <– INSERT YOUR URL HERE can help troubleshoot.
Q6: My flan tastes eggy, why?
A: This can happen if the custard was slightly overcooked, if the eggs weren’t perfectly fresh, or if not enough flavouring (like vanilla) was used to balance the egg flavour. Ensuring gentle baking and using good quality vanilla helps. Straining also removes the chalazae which some find contributes to eggy taste.
Q7: Can I make individual portions?
A: Yes! Baking the custard in individual ramekins works beautifully. Prepare the caramel and custard as directed, dividing them among the ramekins. Place the ramekins in the water bath. The baking time will be significantly shorter than for a large mold – start checking for doneness around 30-40 minutes.
Conclusion: The Sweet Simplicity of a Classic
The enduring magic of the “Condensed Milk and Egg Dessert,” epitomized by the beloved Flan or Leche Flan, lies in its beautiful paradox: achieved through simple core ingredients, yet requiring careful technique for its ultimate, luxurious expression. It’s a dessert that transcends borders and generations, offering comforting sweetness and an unparalleled silky texture. Mastering the gentle whisk, the crucial straining step, the art of caramel, and the patience of the water bath and chill unlocks a truly special treat.